Lup Sarada raws
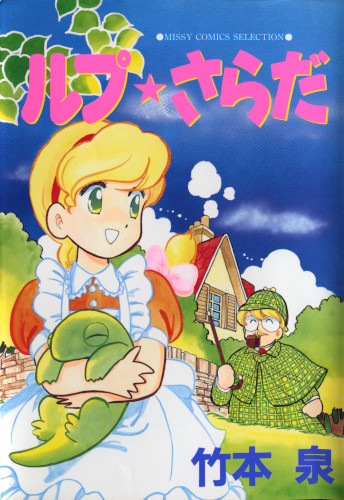
OctonionicHere are some raws for Lup Sarada (ルプ★さらだ), a manga by Takemoto Izumi (竹本 泉) I'll probably end up translating this (and perhaps some other Takemoto works), but it might take a while.
“Untouched” 600 dpi pngs (what I call “stage 2” below)
Levelled and cleaned, still 600 dpi (“stage 4”)
Resized (“stage 5”; probably what you want even if you're going to edit these)
This is my first attempt at scanning. These notes are not so much me pretending to be an expert (I'm not), but rather for myself the next time I feel like doing this.
For debinding, I used this guide. At first, I tried to be over-gentle by using cloth instead of paper to separate the iron from the spine. That didn't work at all: because it didn't heat the glue correctly, I ended separating the book into spine, glue, and pages instead of spine+glue and pages. (The glue also warped and then broke in half.)
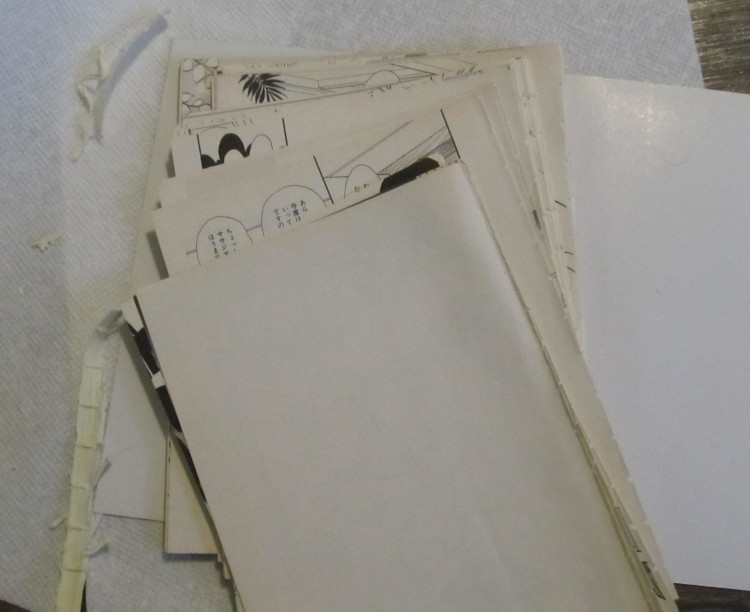
When I'd finished scanning, I rebound with this guide. It was difficult because of my errors before, but the result was satisfactory.
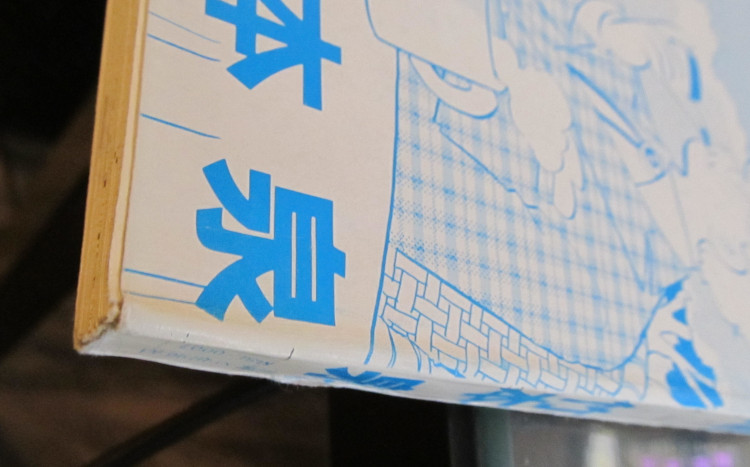
I scanned at 600 dpi using an Epson v300 with a black cloth over the page (to prevent bleed) and a heavy book on top of both (to keep the page flat). I tried to keep the pages straight by lining them up with a side where the scanner had very little dead area. The resulting TIFF files were ~110MB each. Call that stage 0.
Running
convert 123.tiff 123.pnggave stage 1.Manually cropping (luckily I didn't have to rotate much) gave stage 2, with images about ~30MB each.
For stage 3, I ranconvert -colorspace Gray stage_2/123.png -level 0%,87.5% stage_3/123.pngon all the black and white images. The levels were determined experimentally. By this point, the files were ~5MB each.That messes up regions of lower intensity. So what I've done instead is to make a LUT by running
convert -size 10x100 gradient:
-flip lut.png
, then applying GIMP's color leveling, keeping the whitepoint at 87.5% still.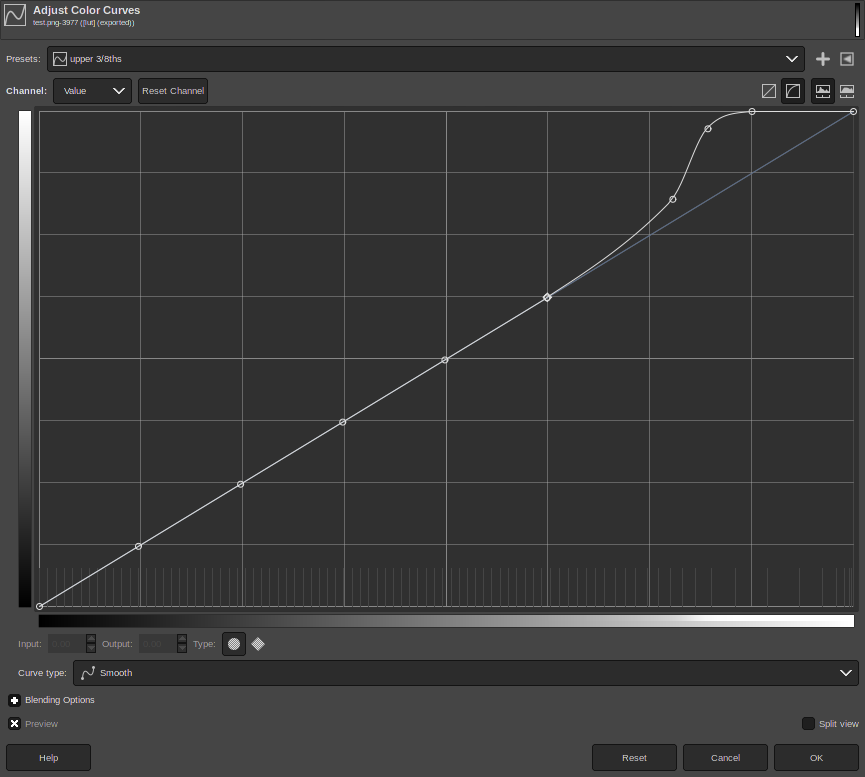
Then I applied that to all images by
convert -colorspace Gray stage_2/123.png lut.png -clut stage_3/123.png.For stage 4, I needed a despeckling method. GIMP's built-in despeck didn't really do what I wanted, but I used something like the following:
   gegl-0.4 123.png -o 123-mask.png \
       id=base \
       gegl:gray \
       gegl:gaussian-blur std-dev-x=1.5 std-dev-y=1.5 \
       gegl:threshold value=0.9735 \
       gegl:multiply aux=[ \
           ref=base \
           gegl:gray \
           gegl:edge algorithm=sobel amount=2.0 border-behavior=clamp \
           gegl:threshold value=0.8 \
           gegl:invert \
       ] \
       gegl:color-to-alpha color=black opacity-threshold=0.001
This takes the image and creates two masks: one a gaussian blur and the other an (inverted) edge degection. These masks are then converted into pure black/white at various thresholds and multiplied together (bitwise and-ing them) into one mask.
Any pixel that remains white in the final result is 1) not dark enough to be a pen stroke, and 2) not near an edge of high contrast in the image. Those pixels are kept as white, and everything else is thrown to transparency, which makes a decent despeckling mask. It's good at removing small specks from large, white areas while allowing me to keep the whitepoint level relatively high, which is what I wanted.
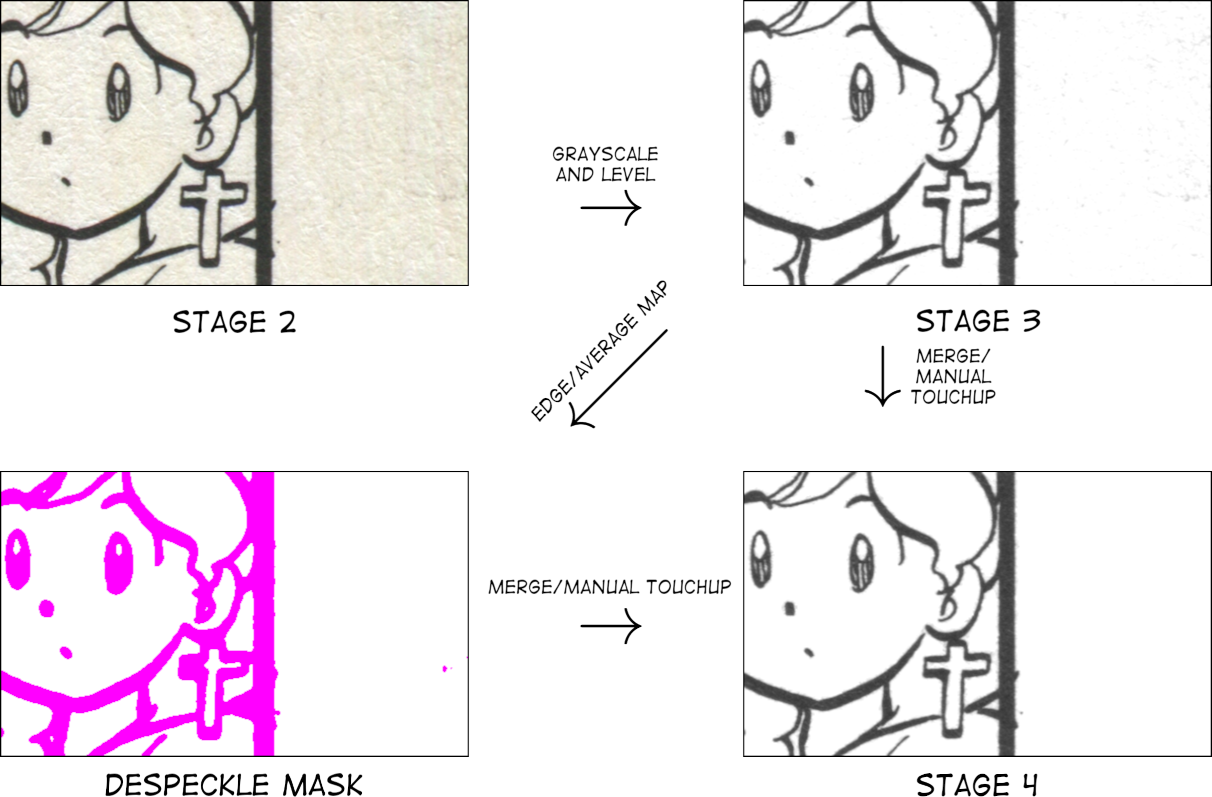
As you can see, some large specks were ignored, but those were relatively simple to detect and clean by hand. Certain types of shading were negatively affected, but it wasn't too bad to manually remove those areas from the mask. The filesizes didn't change much, which I was a bit surprised about.
stage 5 was the result of the above, downscaled with
convert
-resize 2000x2000 stage_4/123.png stage_5/123.png
. Final releases were either run throughpngcrush -bruteorcjpegxl -s 9.